Steps
1. Download the pfSense-memstick-serial-X.X.X-RELEASE-i386.img.gz image
2. Clone this image to a CF card using whatever tool you fancy (I used Win32DiskImager)
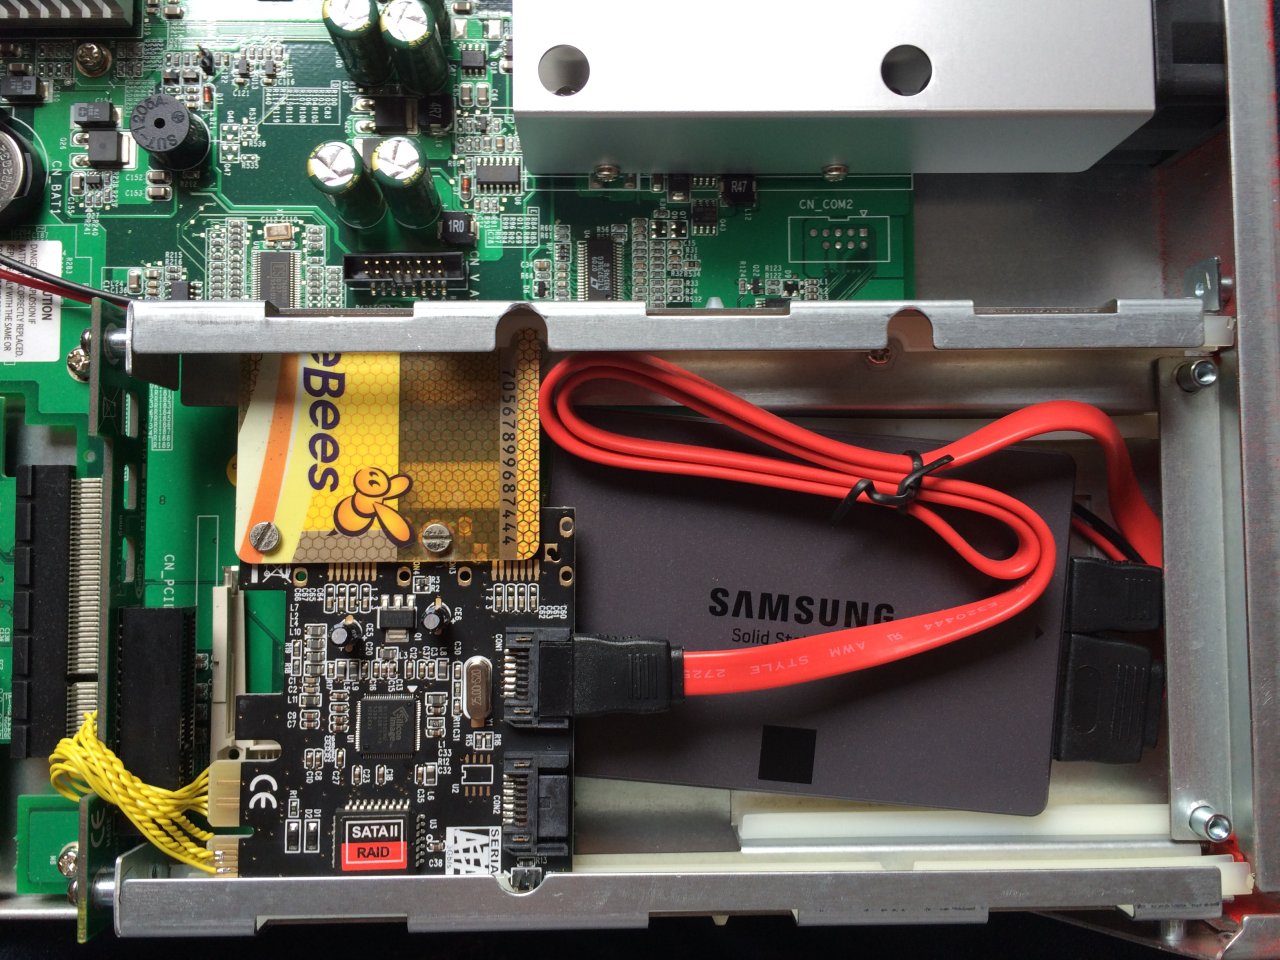
3. Open the firebox. On the right far side of the unit, you'll find the HDD/Expansion cage. This is where we'll put the SSD and controller
4. Remove the PCIE riser card. It's held in place by 4 screws
5. Remove the bracket from the SATA controller
6. Wedge your controller in the PCIEx4 slot. It's a bit of a tight fit, and parts can probably touch the metal drive cage. Put a little piece of paper there if it does.
7. Strip the wires on your sata power cable, and stick the stripped ends somewhere in the motherboards molex connector on the left side of the board. I went with the red ones (5v), and matched that with the colors on the connector. Don't bother hooking up the 12v on the sata connector; most SSD's (every SSD I've ever seen) only need +5v
8. Hook up your SSD to the controller and power supply. You'll end up with a funny looking contraption (first image)
9. Insert your CF card, and boot the thing! Enter the bios, set the CF card to Manual, set the mode to CHS, and set headcount to 2.
10. Set your serial terminal to 9600 8N1
11. Install pfSense from the CF card. Do a custom install! The normal 'easy' install will attempt to install to your CF card. You don't want this. (it'll fail too...)
12. If everything worked, the installer will recognise your harddrive/controller and allow you to install to this disk.
13. When asked if you want some sort of special kernel, choose the embedded kernel. This will allow you to keep using the serial console
14. Turn the firebox off, remove the installer CF card, and reboot!
15. The first time you boot this thing from powerup, you'll likely get some sort of kernel trap. Don't worry about this. The box will reboot automatically, and won't crash this time. This guy had the same problem. Not sure what this is.
16. Everything works? Awesome. Lets whip out the soldering iron and make everything fit in the box.
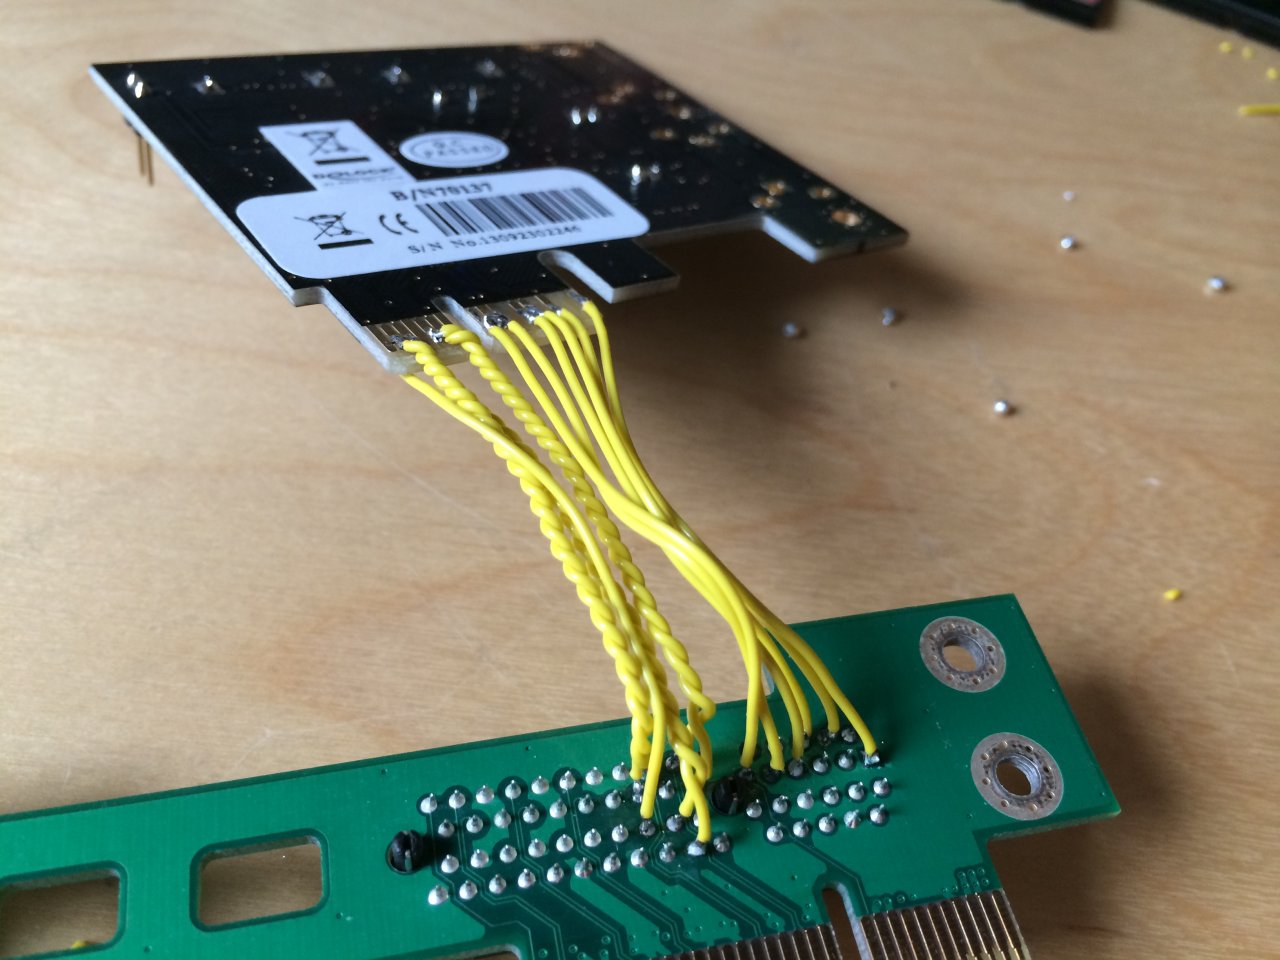
17. Google the PCIE pinout, and keep it somewhere handy.
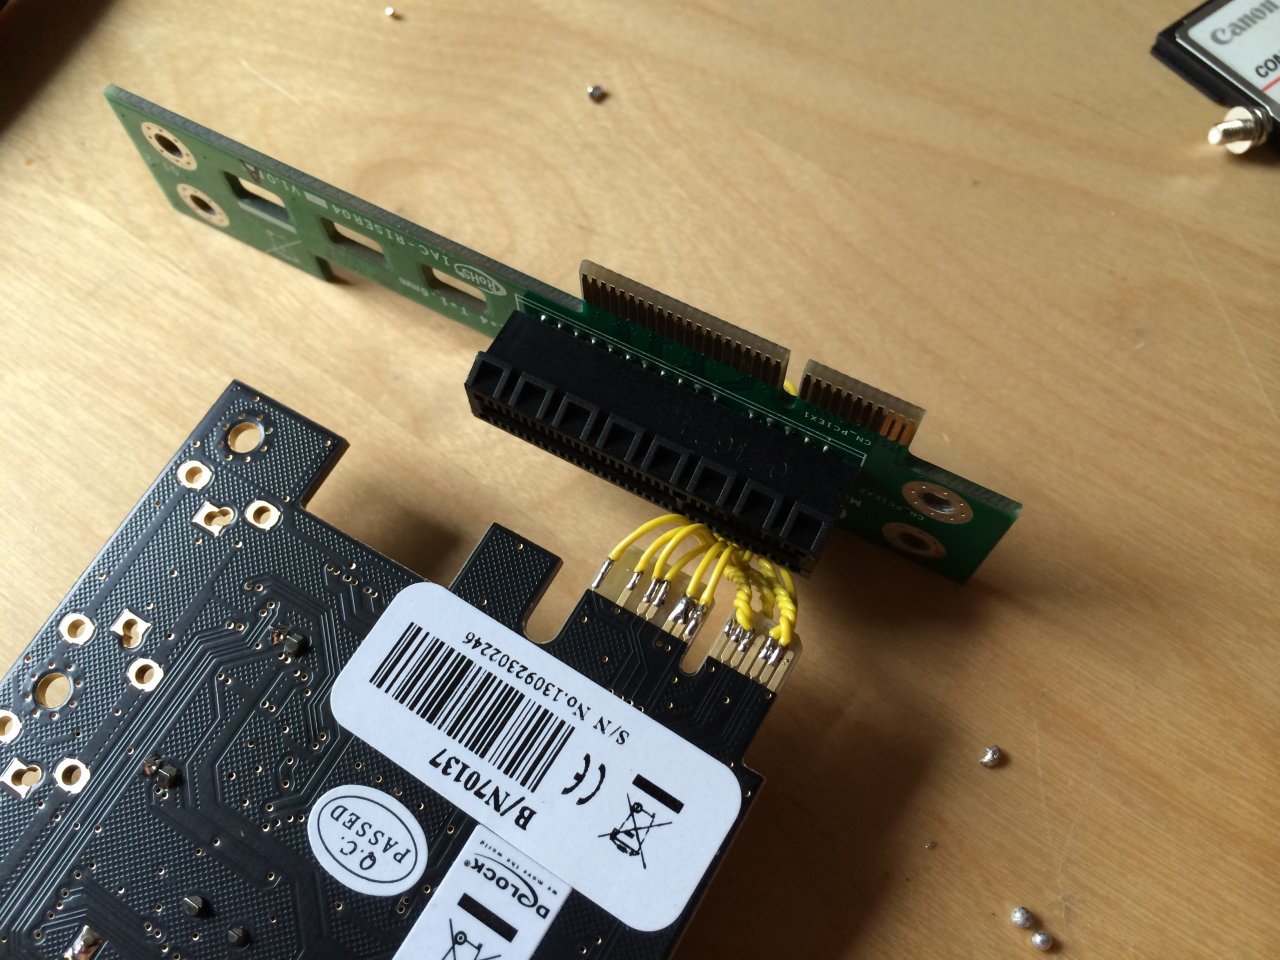
18. Get the controller board, and find out exactly which pins are needed/used by the controller board. In my case, only the 'used' pins were routed on the board, probably to save some money on gold-plating. On a PCIEx1 card, it should be something like 13 wires.
19. If you look at your PCIE cheatsheet, you'll find 3 wires that have + and - signals. These are differential, and should (preferably) be kept together. I twisted them together.
20. Solder your wires to the riser card. Make sure they're long enough, but don't make them too long. (couple of inches should be enough)
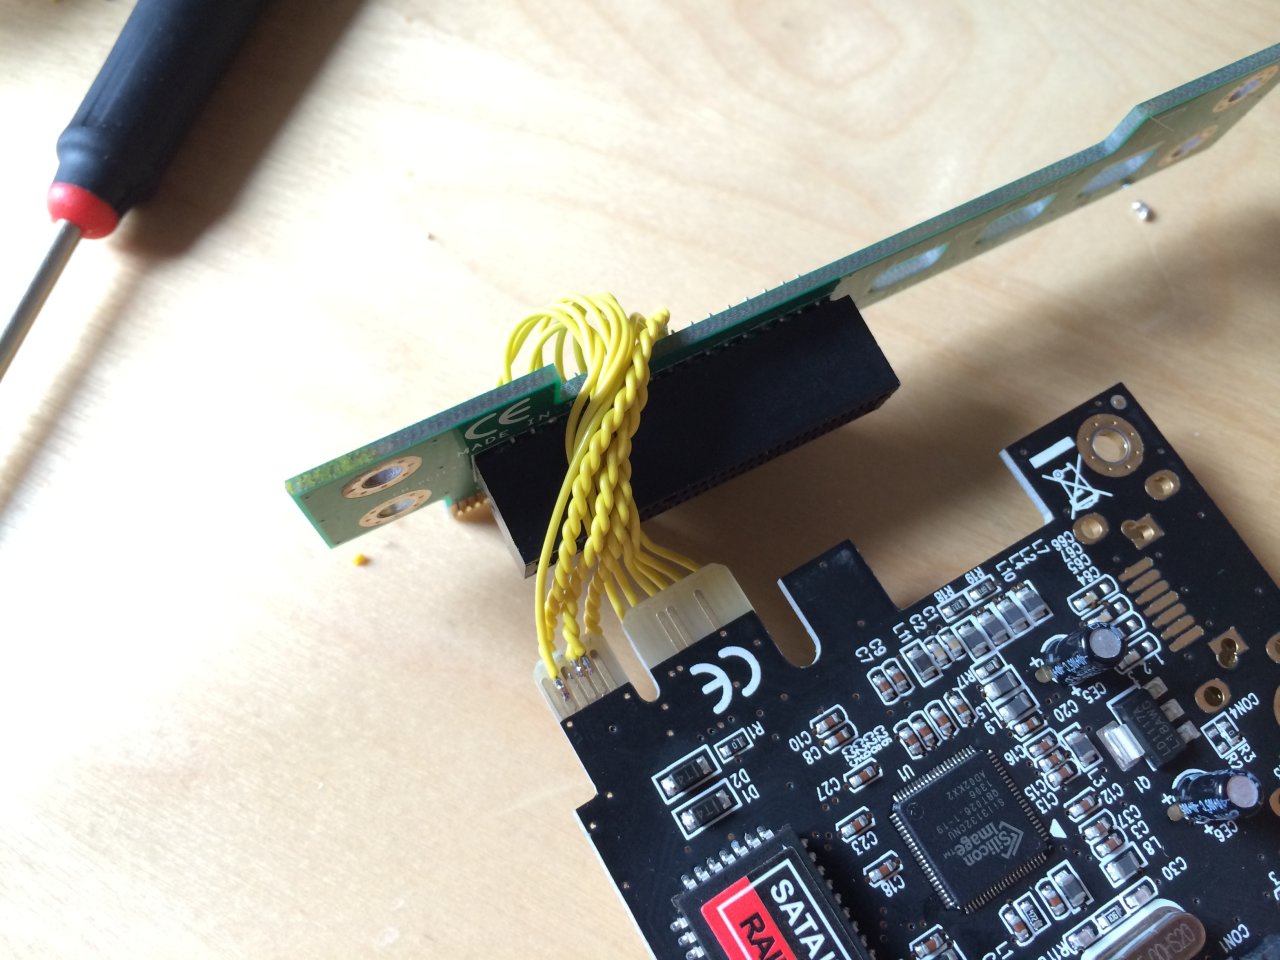
21. Cut your plastic card in half, and make two holes matching the bracket holes on the card. We'll use the card to hold the sata controller between the plastic rails in the expansion cage
22. Use some screws to attach your card to the controller
23. Solder the sata power cable to the motherboards molex connector. It's possible to find +5v somewhere closer to the expansion cage, but I didn't bother looking.
24. Hook everything up, and close the case!
Enjoy the new (nearly) unlimited storage on your firebox!
Comments
-
Just came across your build in my research for my x550e mod. Great info - but i'm curious why you wired the riser to the controller instead of just slotting it in...
-
Just came across your build in my research for my x550e mod. Great info - but i'm curious why you wired the riser to the controller instead of just slotting it in...